
DIY Kitchen Backsplash Tile Installation
Installing a kitchen backsplash by your own has never been easier
By Clay Imports
Join our very own sales and design manager, Anna Lood, in her DIY backsplash project for a kitchen renovation! In this blog entry, we will explore the steps Anna took to complete her kitchen backsplash project, while providing a helpful guide for others interested in similar DIY projects!
Preparation
To begin, it is important to protect any existing surfaces and other items in the kitchen that could be affected during the installation process. This ensures that no damage occurs and the installation materials do not interfere with other elements.

Next, Anna explains the process of measuring the space to determine the amount of tile required. We suggest adding a 15-20% overage to your sq ft measurement, in order to account for any mistakes or adjustments during the DIY project. Fortunately, here at Clay Imports you can add an overage percentage during your item selection! Keep in mind that our measurements are always in sq ft.
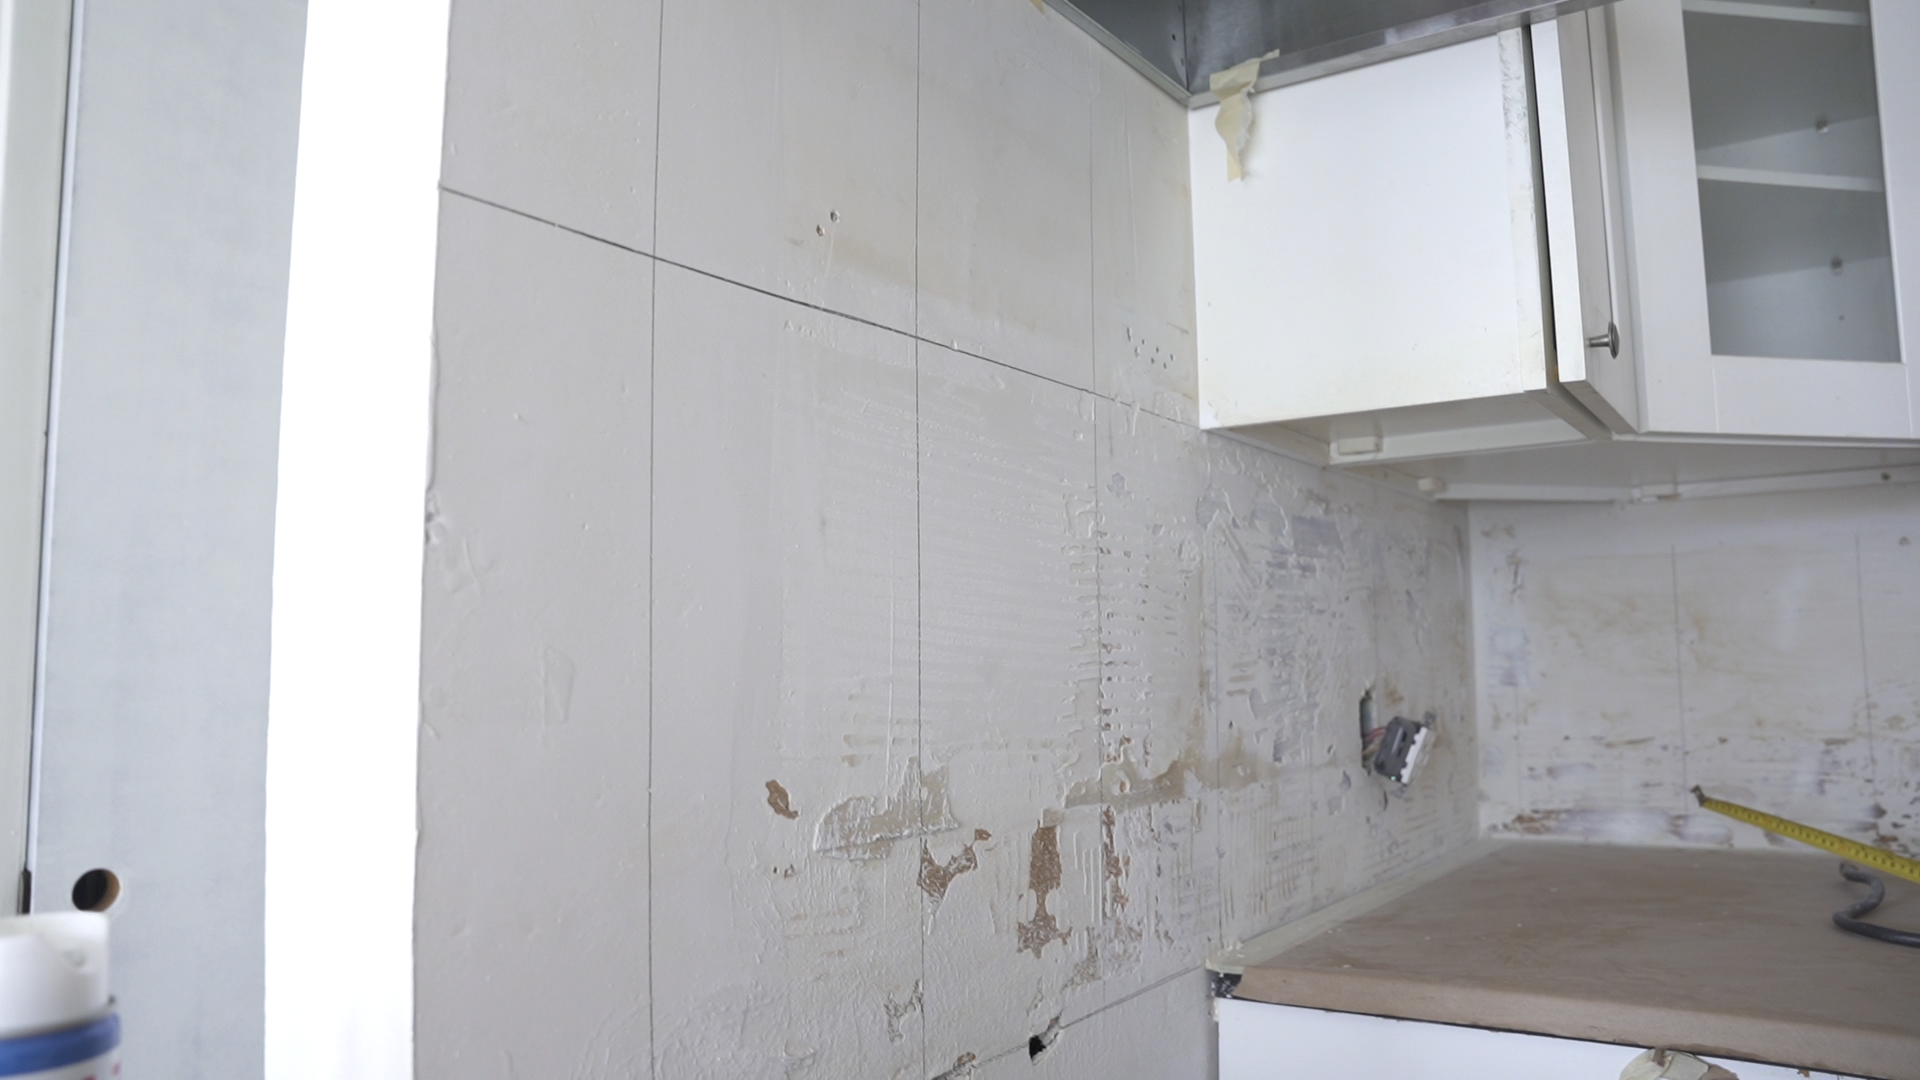
Anna also advises considering the material the tile will be installed on. In this case, she has sheetrock, which is a common surface for modern backsplashes. However, different textures may require different installation materials, so it's essential to select the appropriate tools and supplies accordingly. You can check out our glazed tile installation guides for more tips and recommendations.
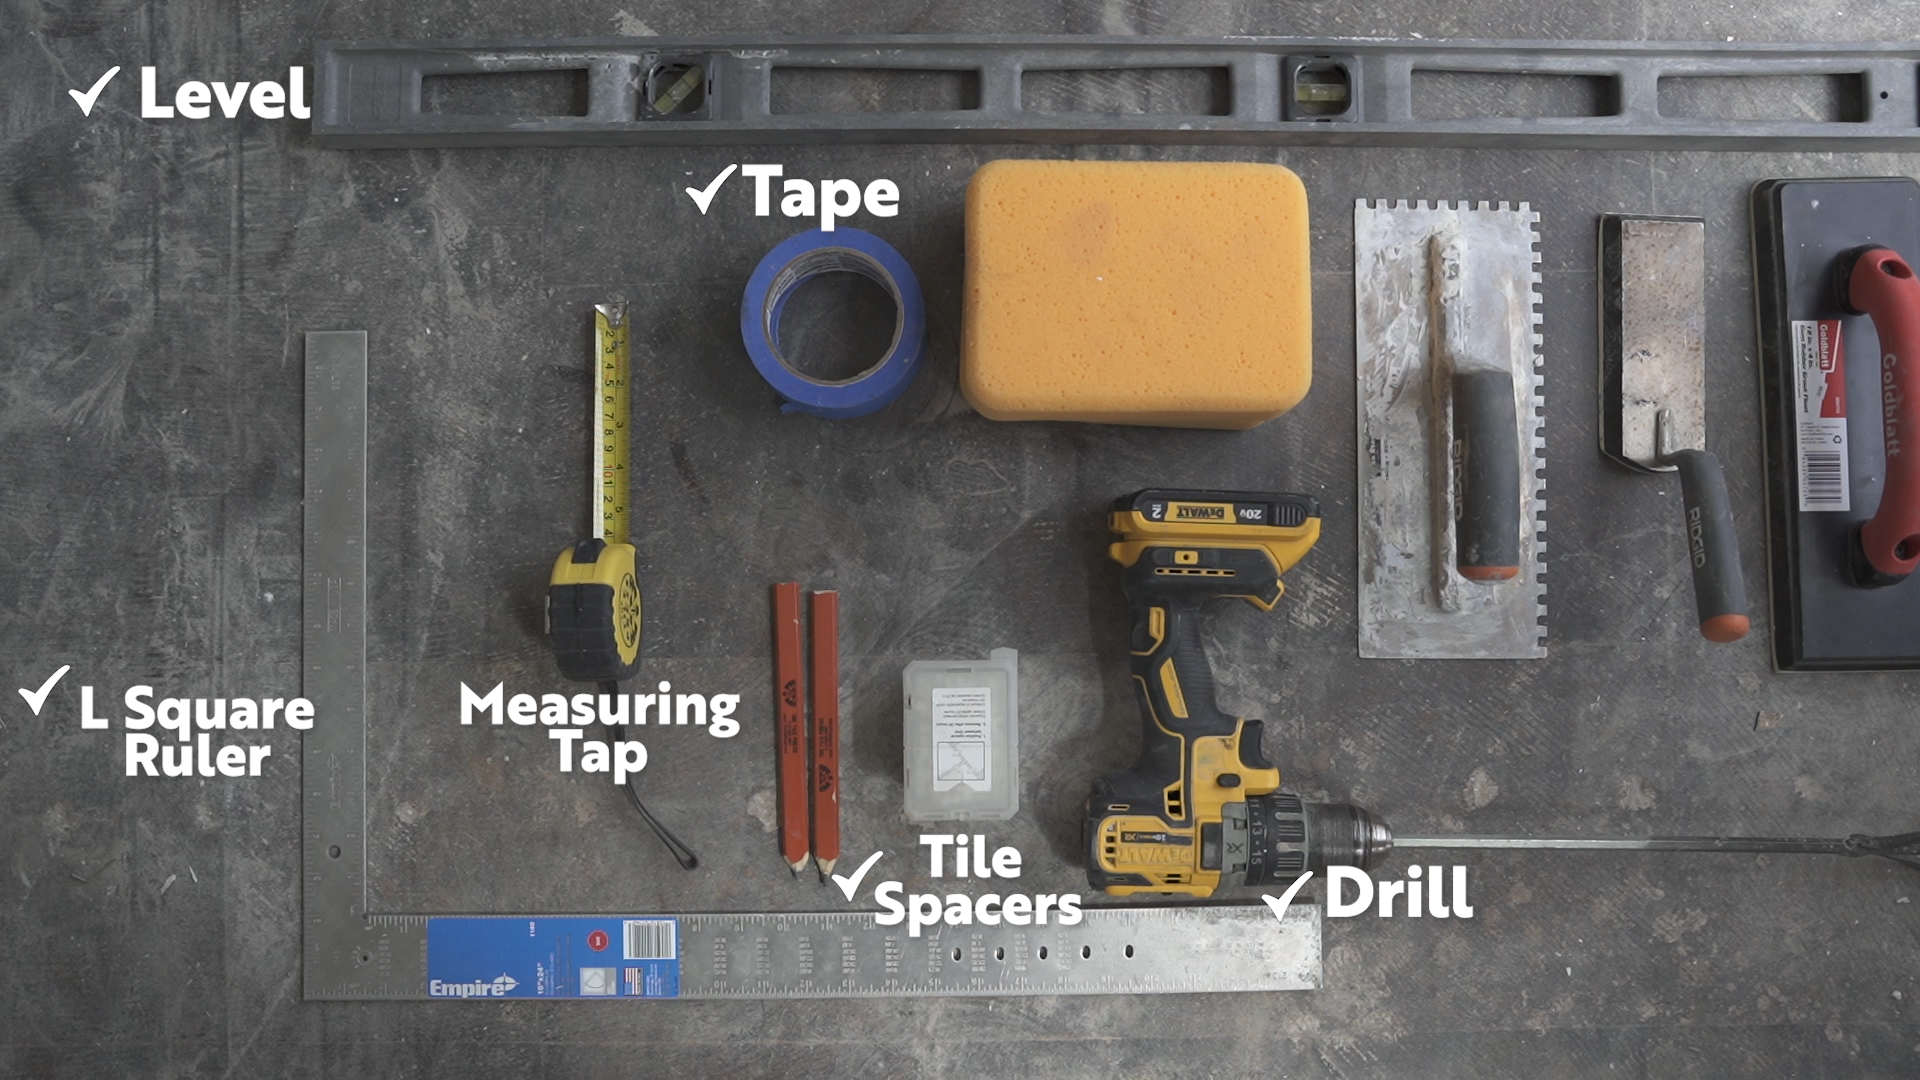
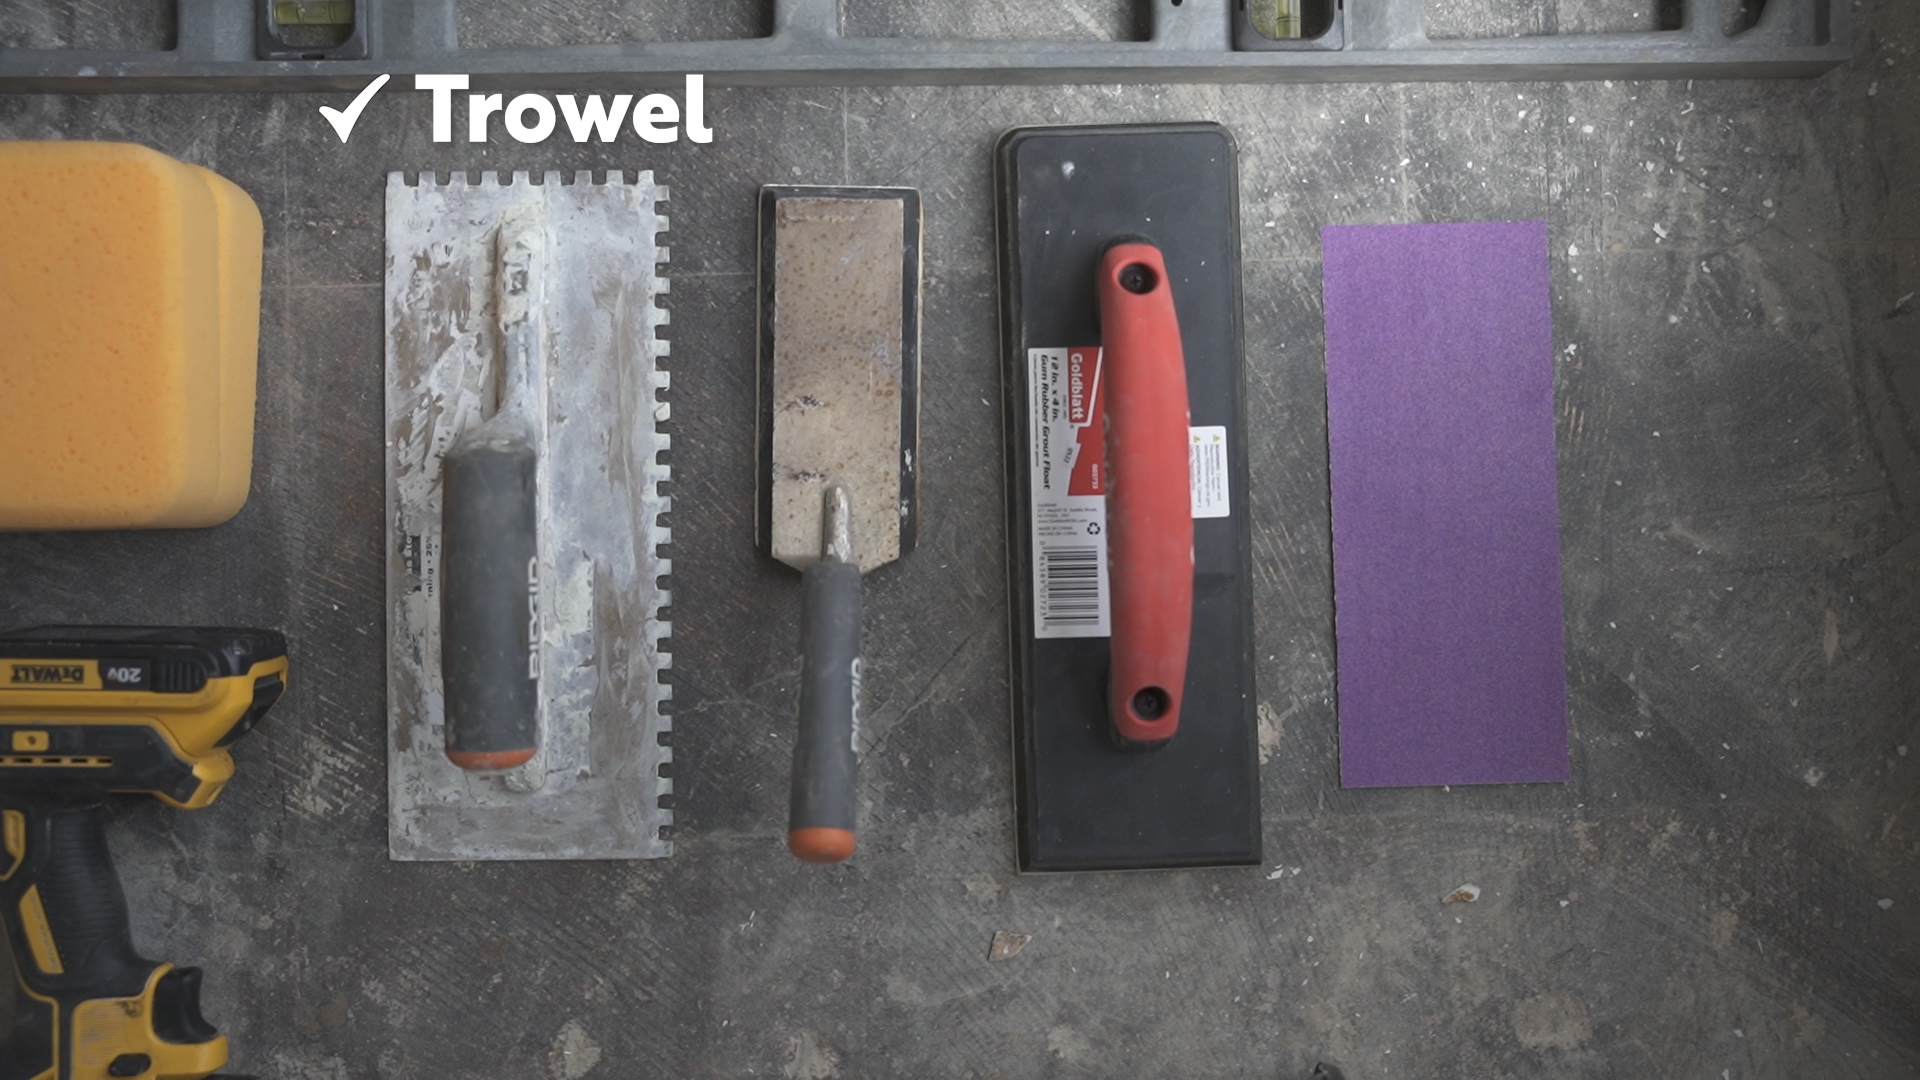
Materials and tools
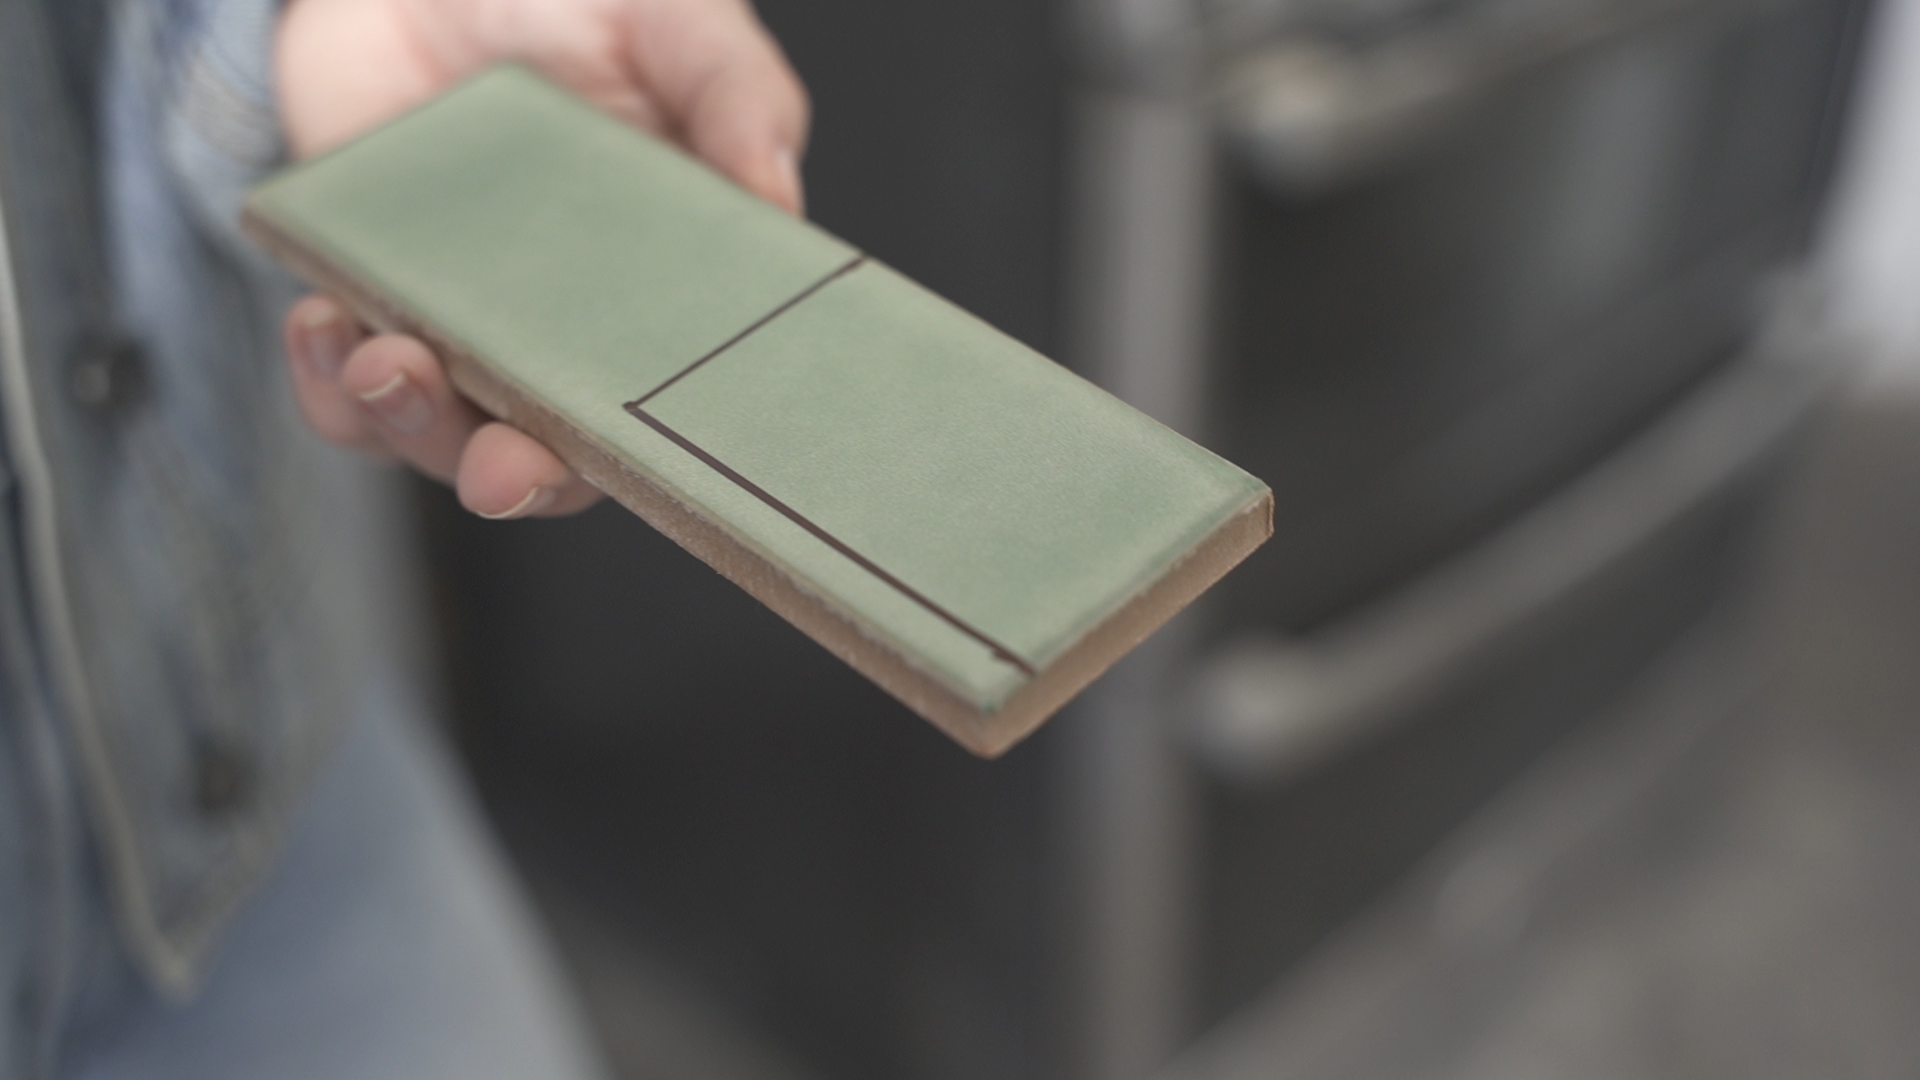
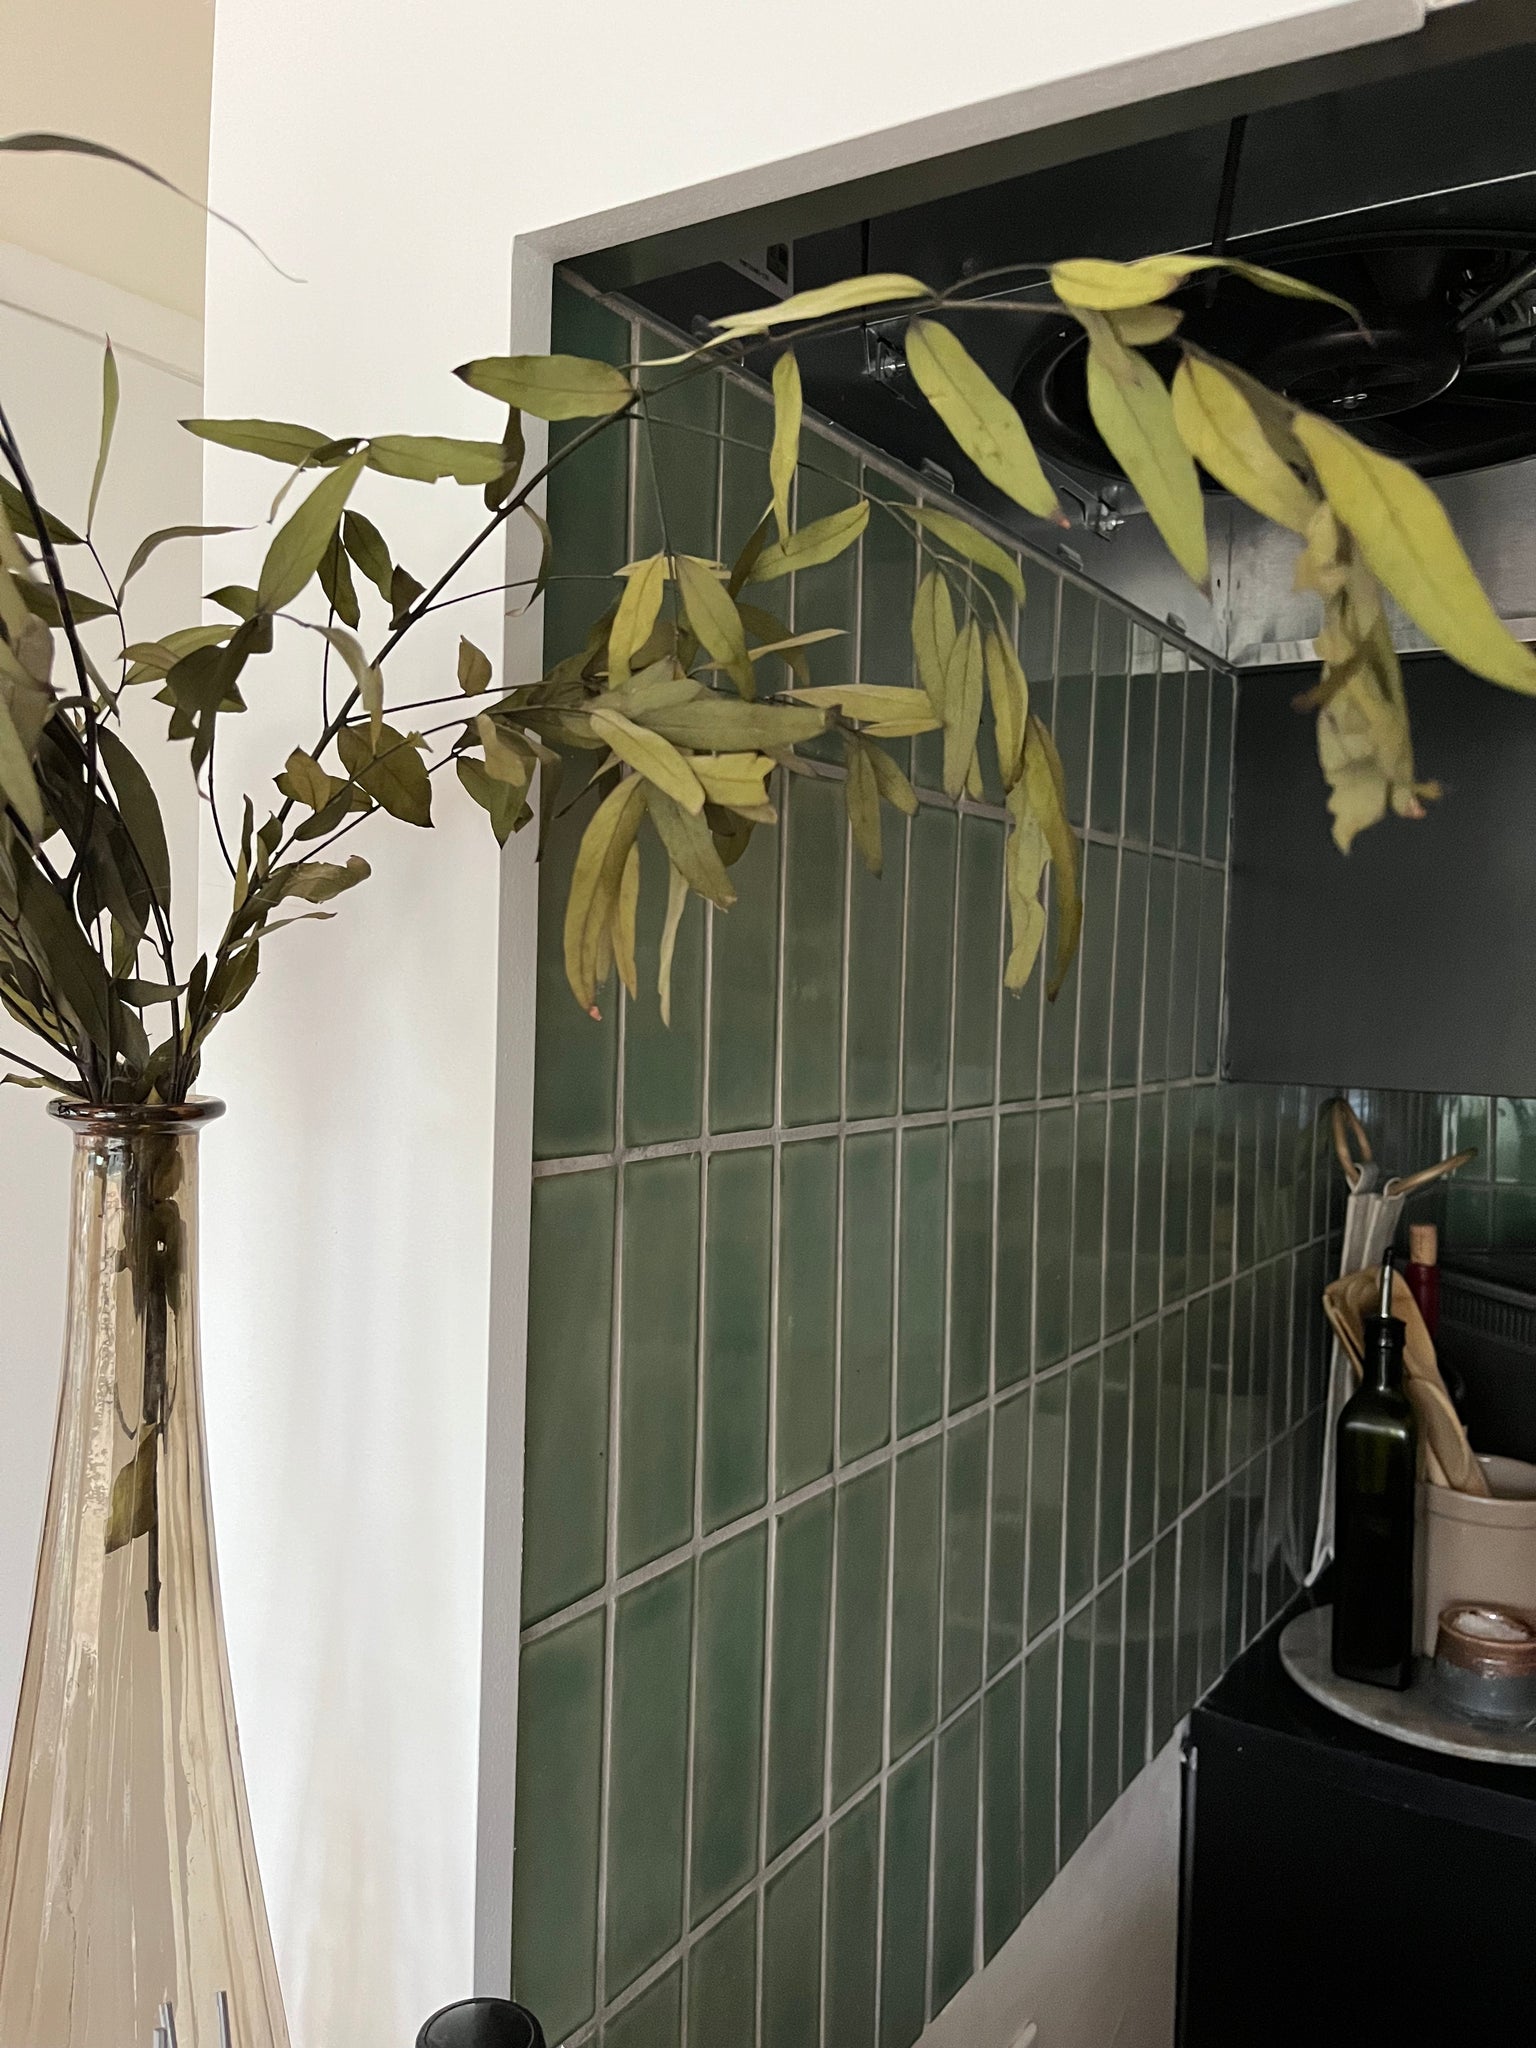
For this specific installation, along with the tools necessary for tile installation, Anna used mastic, grout and our Clay Imports Meadow tiles 2” x 6”. These tiles, like all our glazed tiles, are handmade and as such they exhibit natural variations, which are inherent traits of natural products like Terracotta. These variations are not defects but rather a natural part of the product. We highly recommend ordering samples before making a final purchase to confirm and appreciate these natural variations in each tile.
We’ll show you those materials and tools, so you can have an idea of what you could use for your own DIY project.
Installation
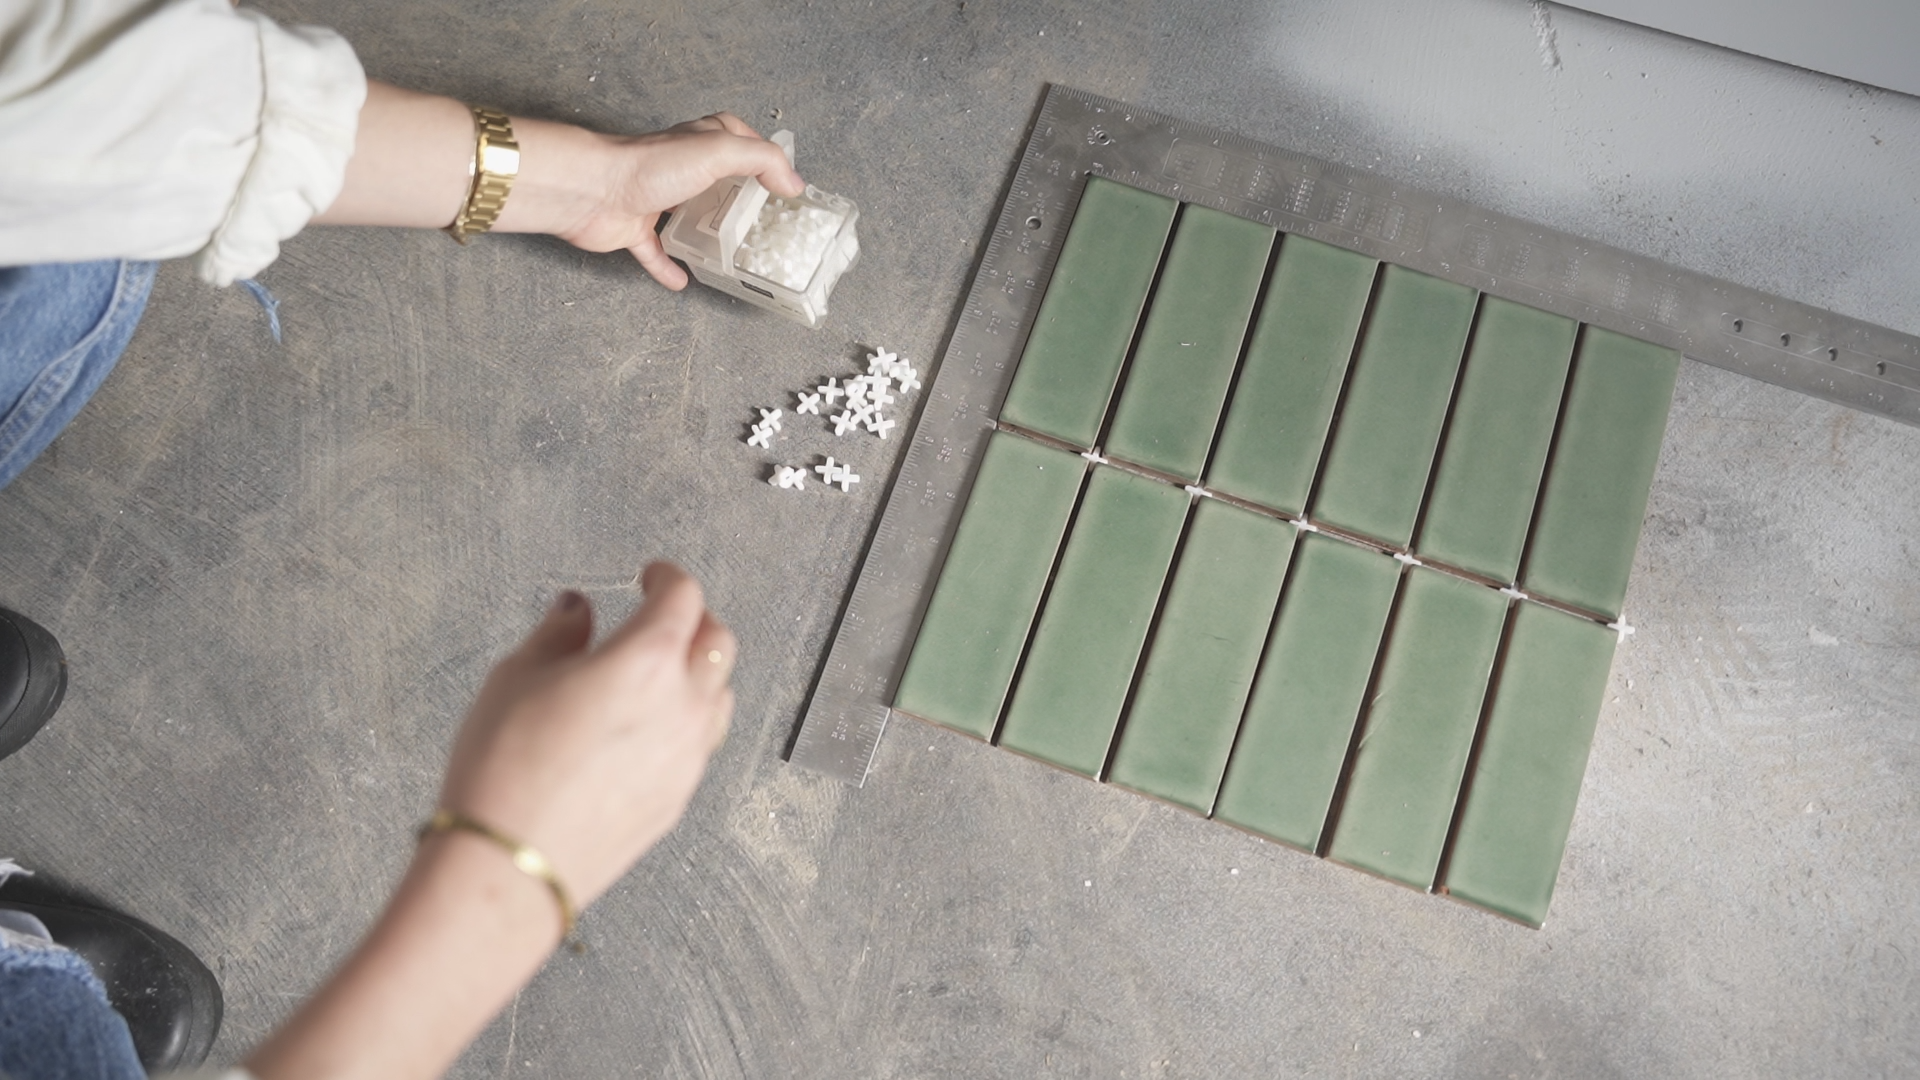
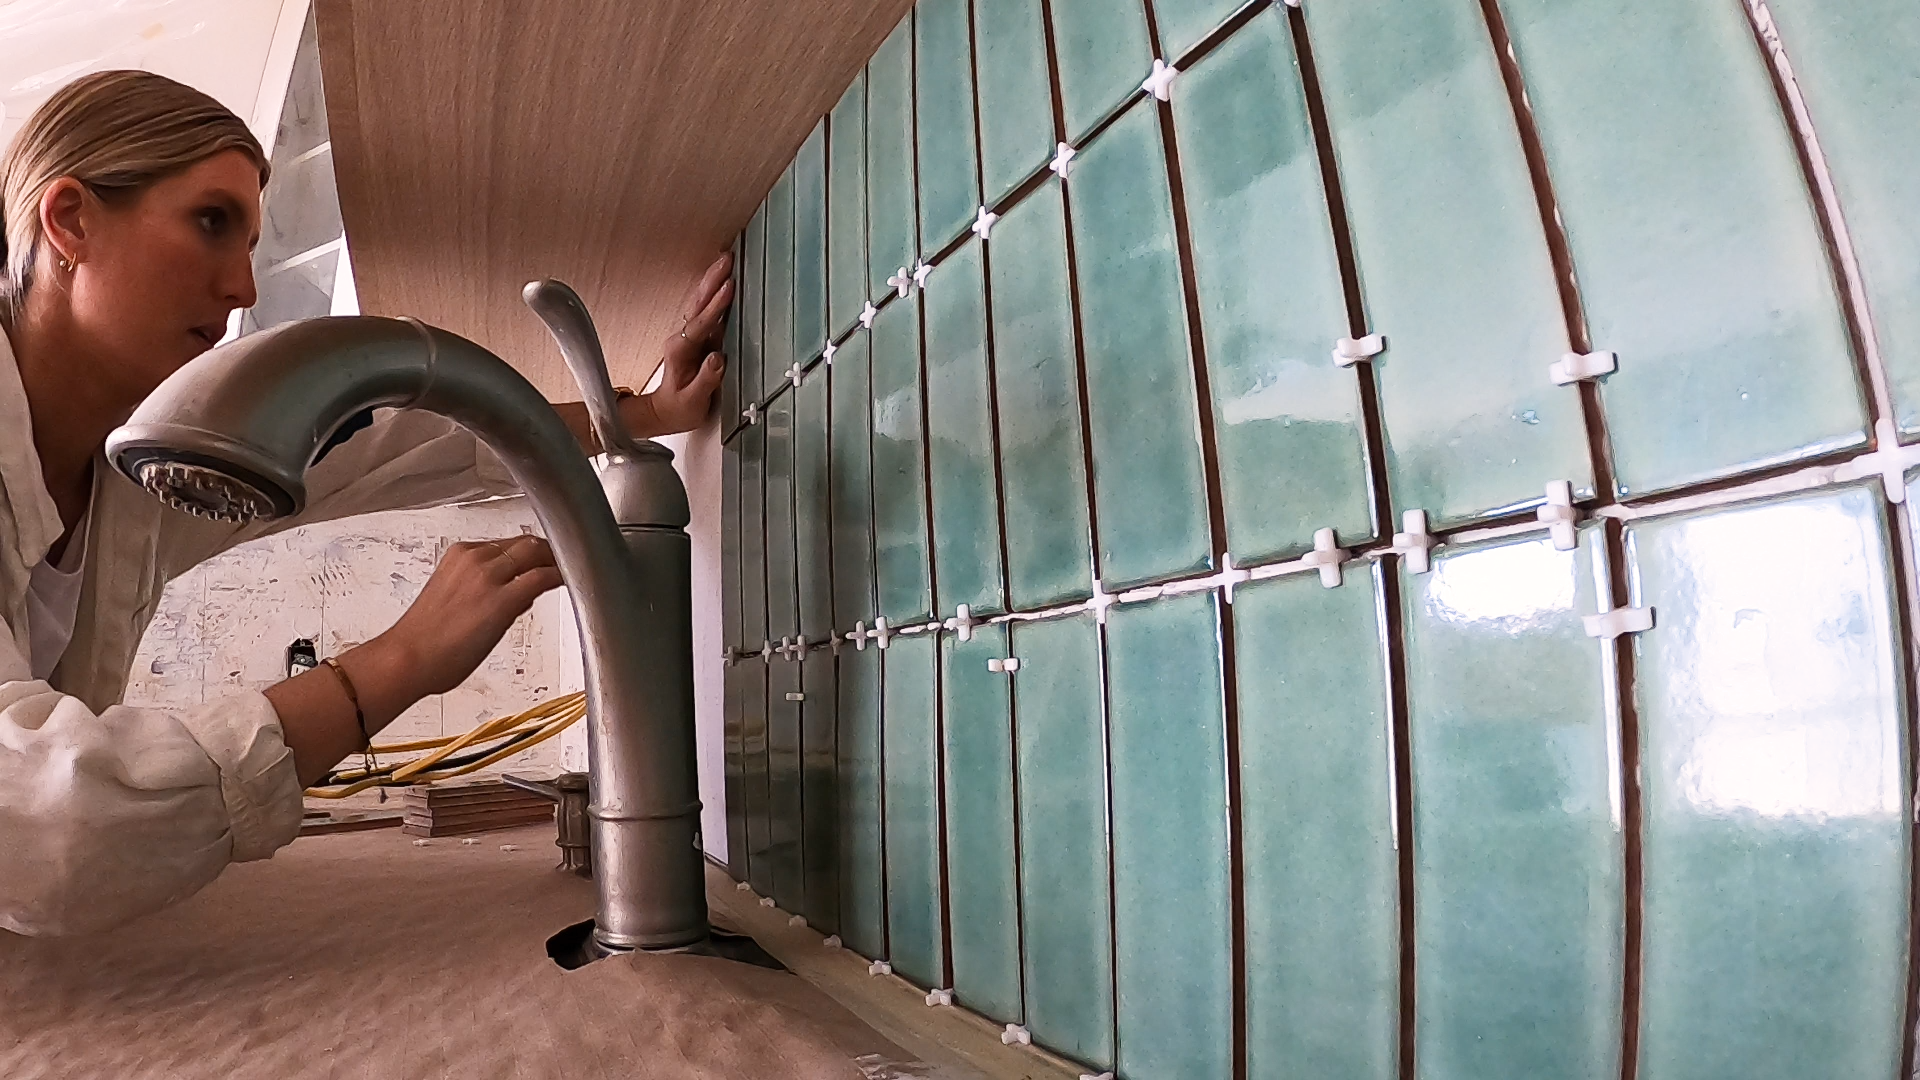
Anna demonstrates the process of laying out a grid using spacers to create a visually pleasing arrangement of the tiles, highlighting the importance of achieving even spacing and adjusting as needed to ensure a professional finish. Anna draws inspiration from the mid-century style of her home and tailors the tile layout to match that aesthetic, but you can follow any style you like. If you need inspiration, you can always consult the Clay Imports product page that has helpful design tips and take a look at our Pinterest or Instagram.
 The next step in the installation process is finding the center line. Anna marked the center line based on the faucet's location, but you can use any strategy to find the ideal center line of your installation space.
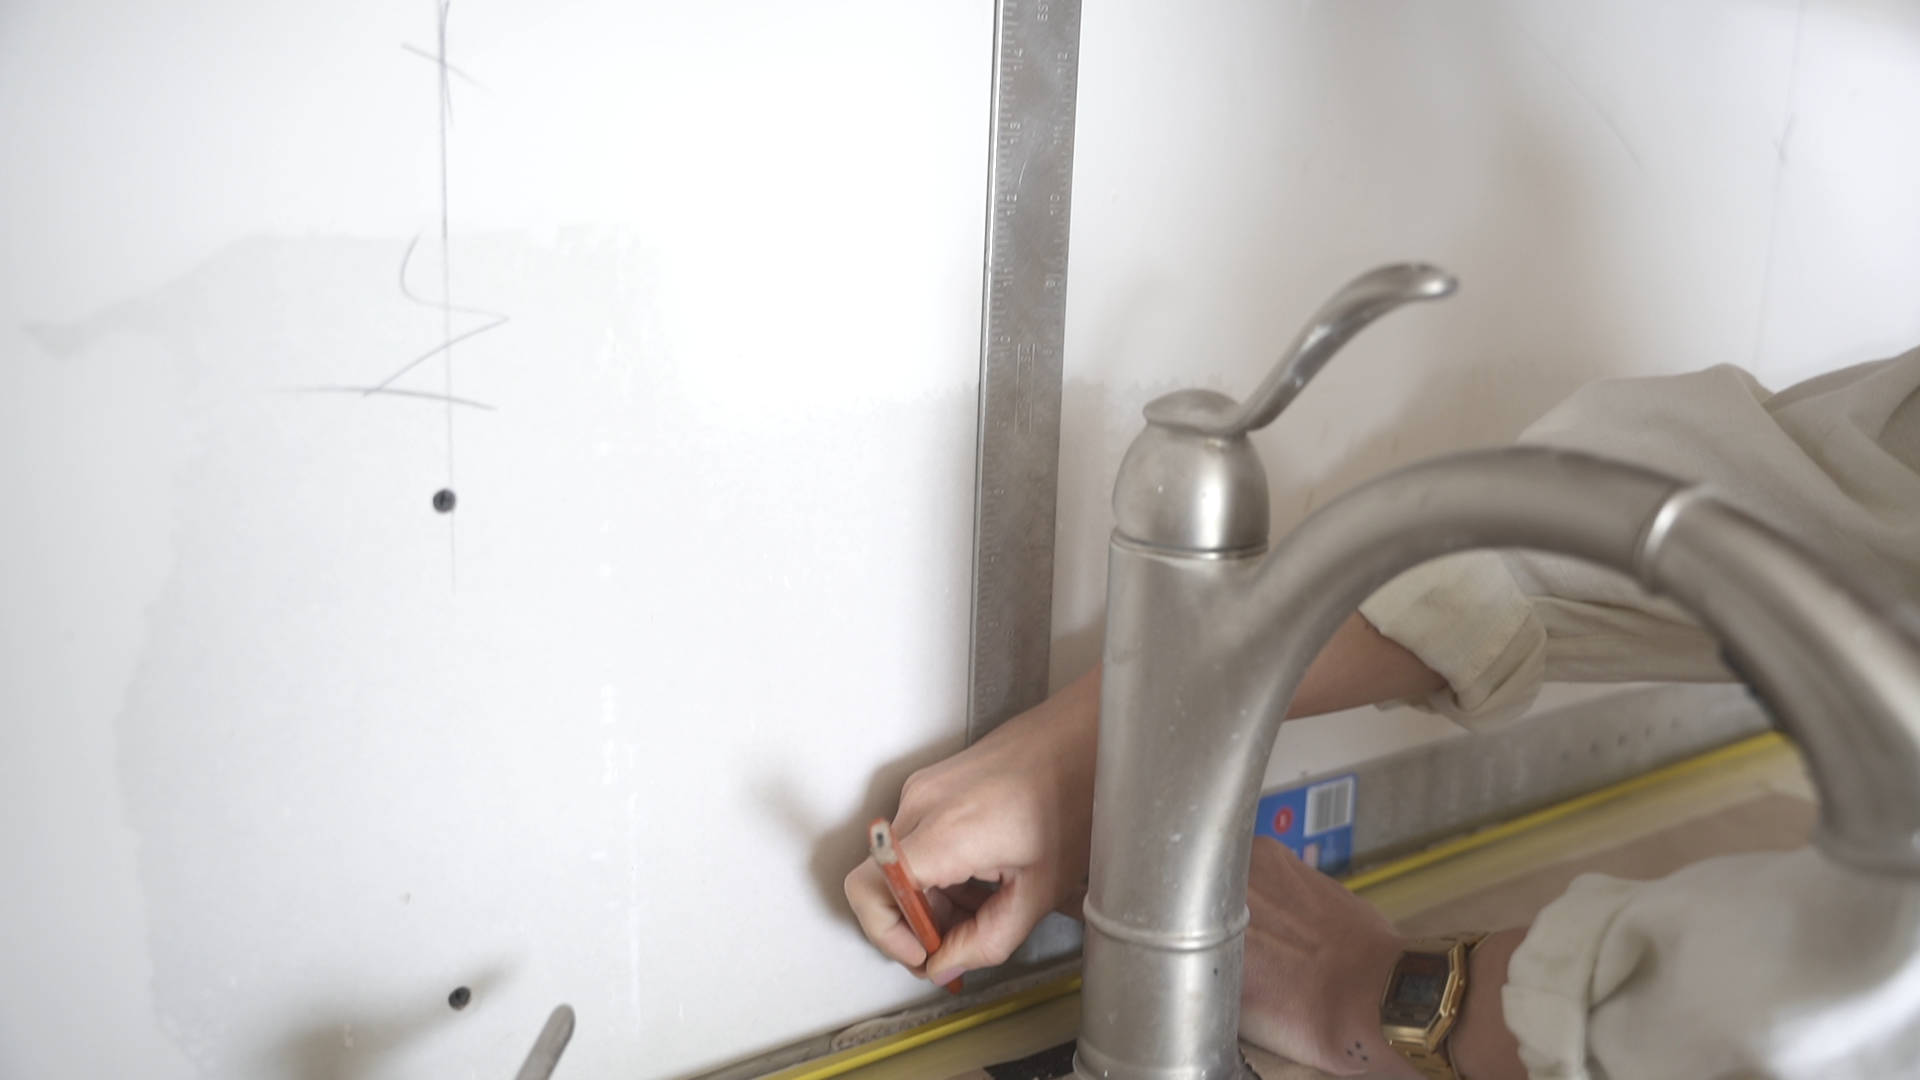 From the center line, she extends measurements to create a grid pattern for the backsplash. It is important to to adjust spacing as needed to accommodate any irregularities in the space.
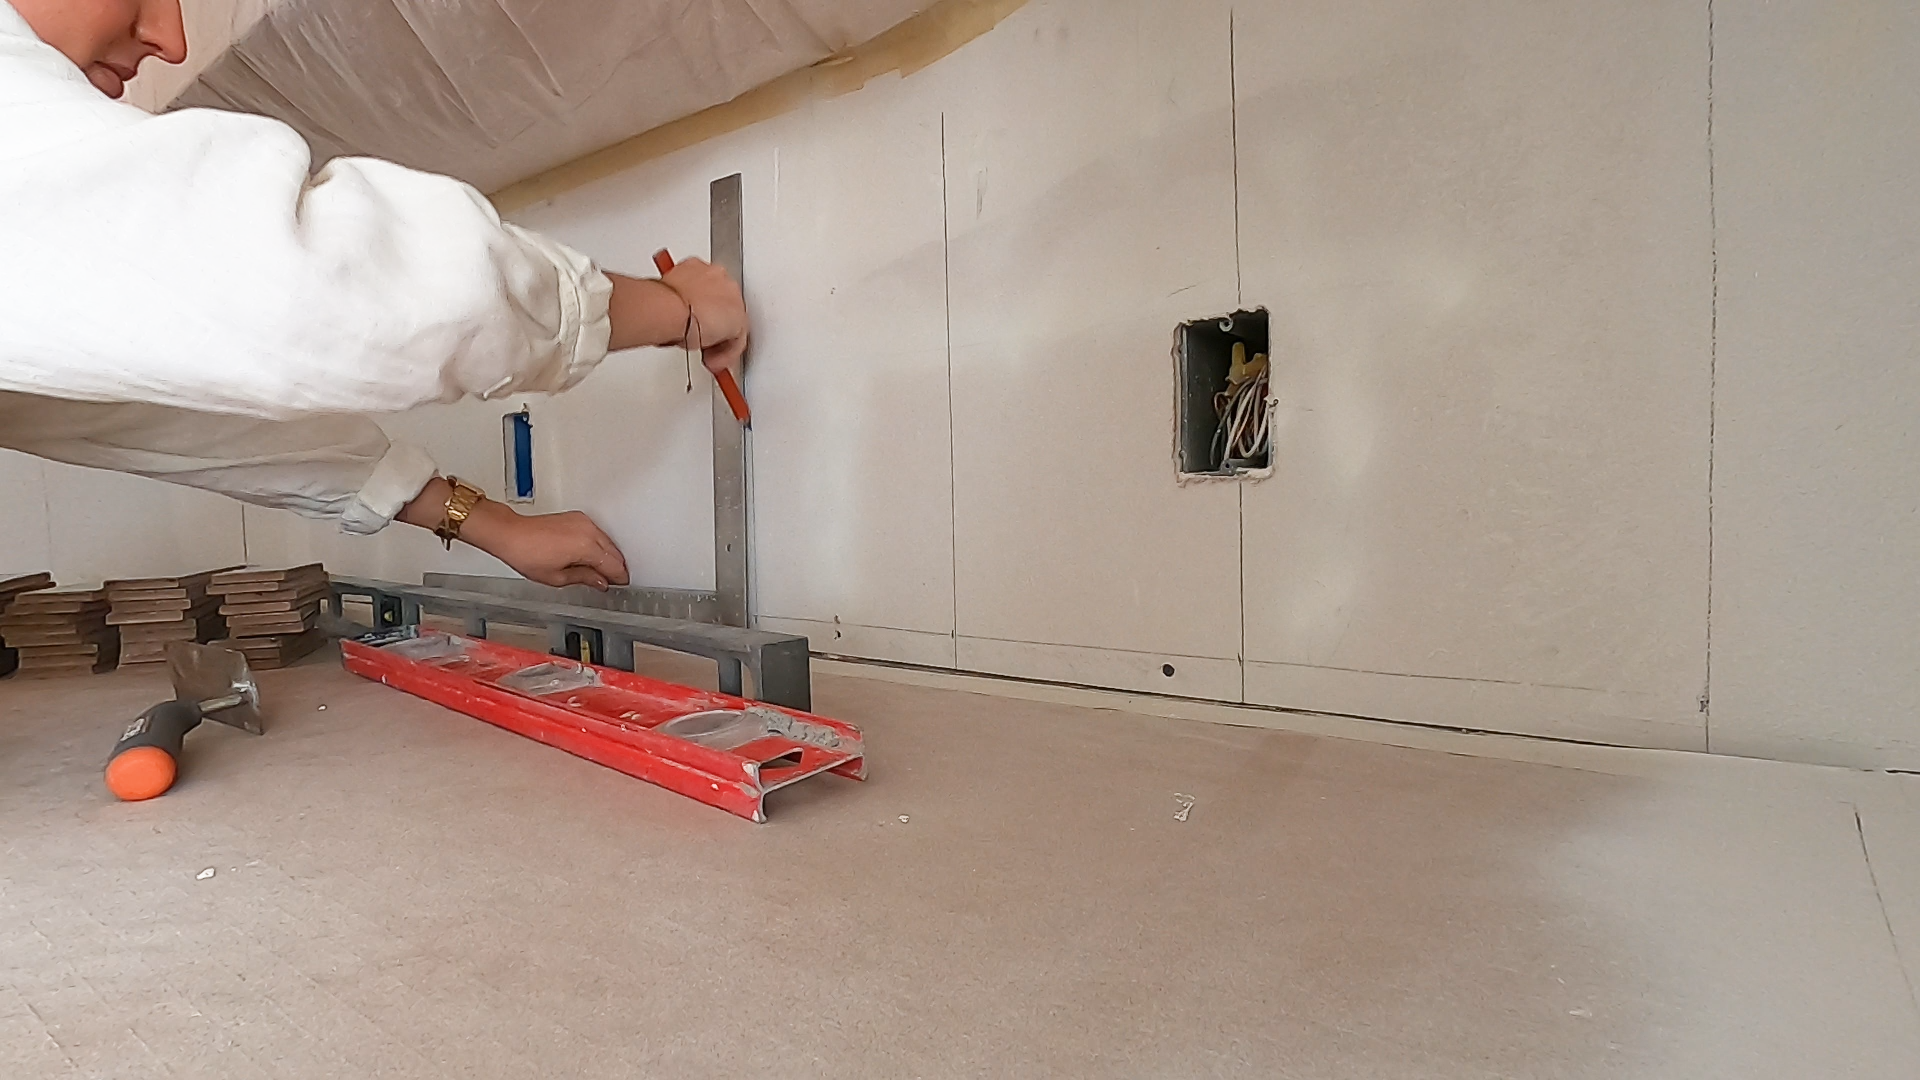
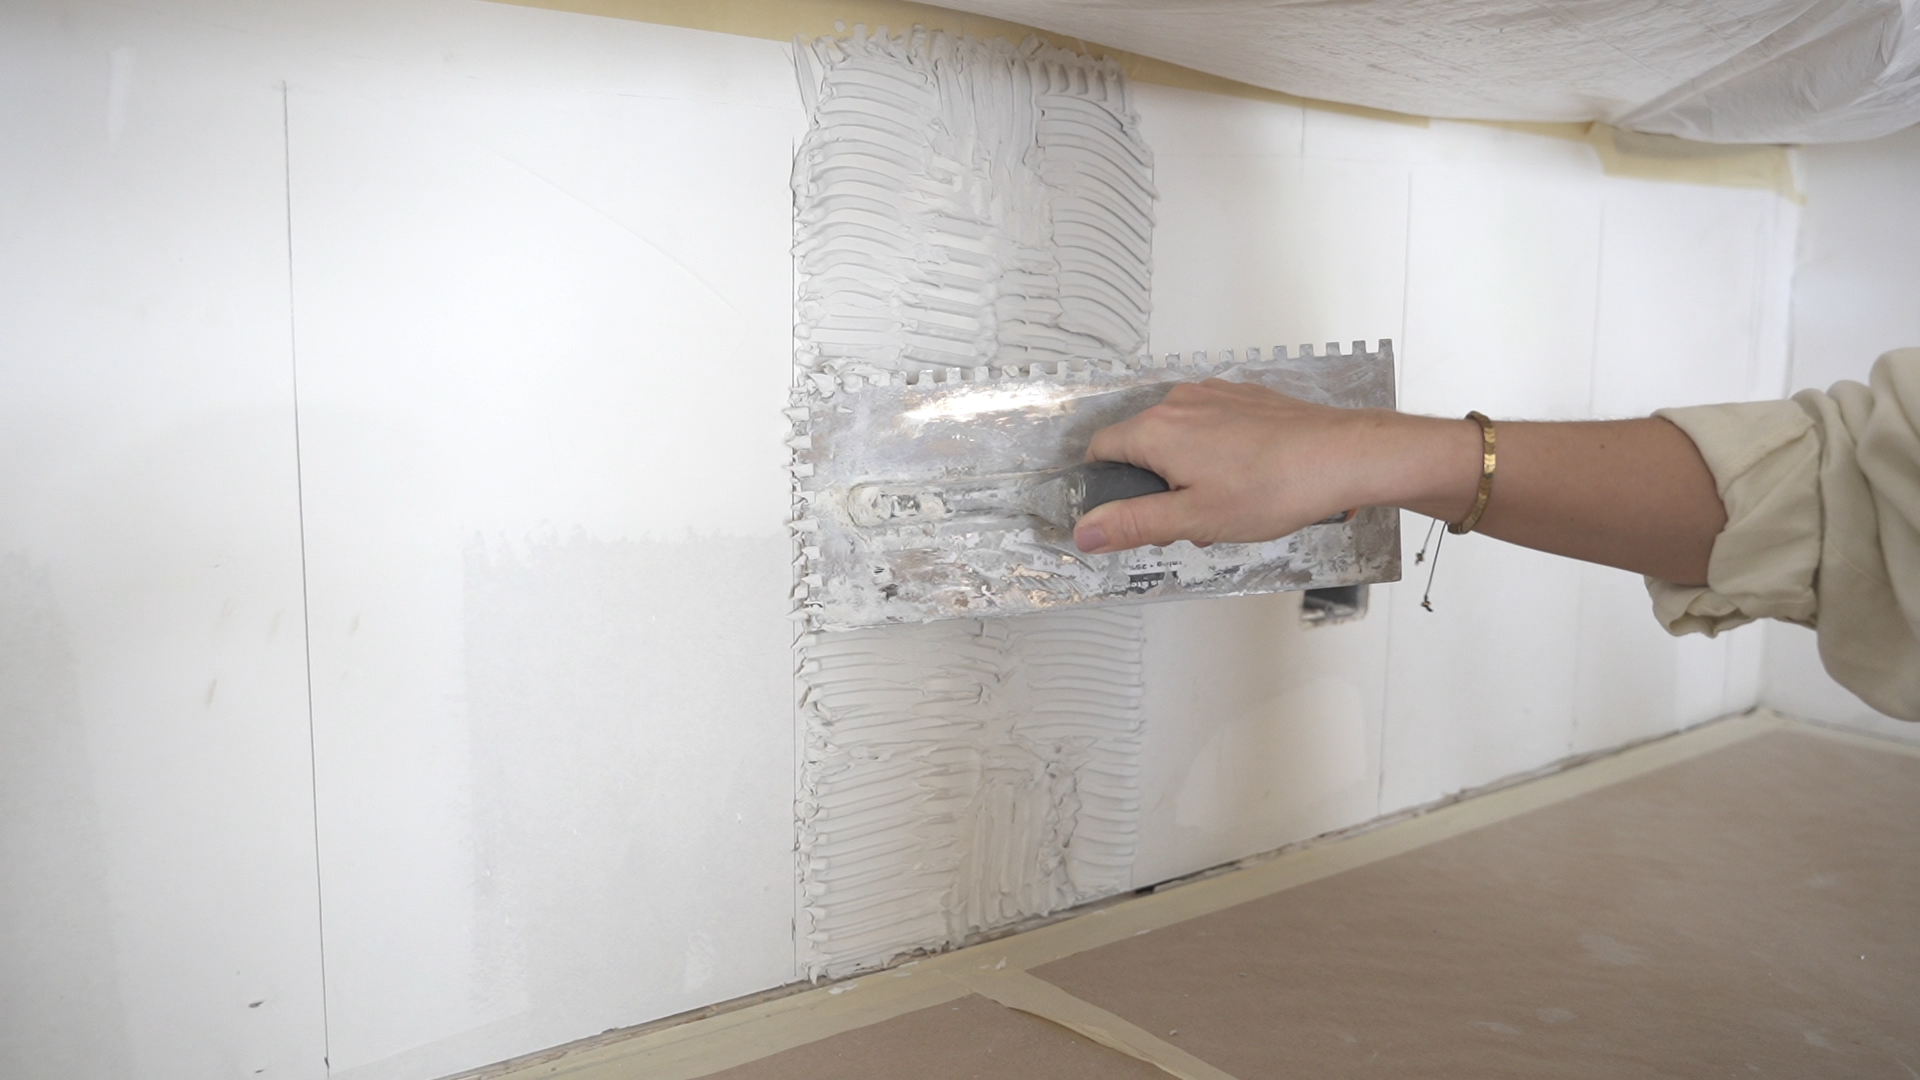
 With the grid established, Anna applies mastic to set the tiles. The mastic allows for some adjustments during the process to account for small irregularities in the handmade tiles. The mastic used for this DIY installation is from Home Depot, but you can use any brand you like best.
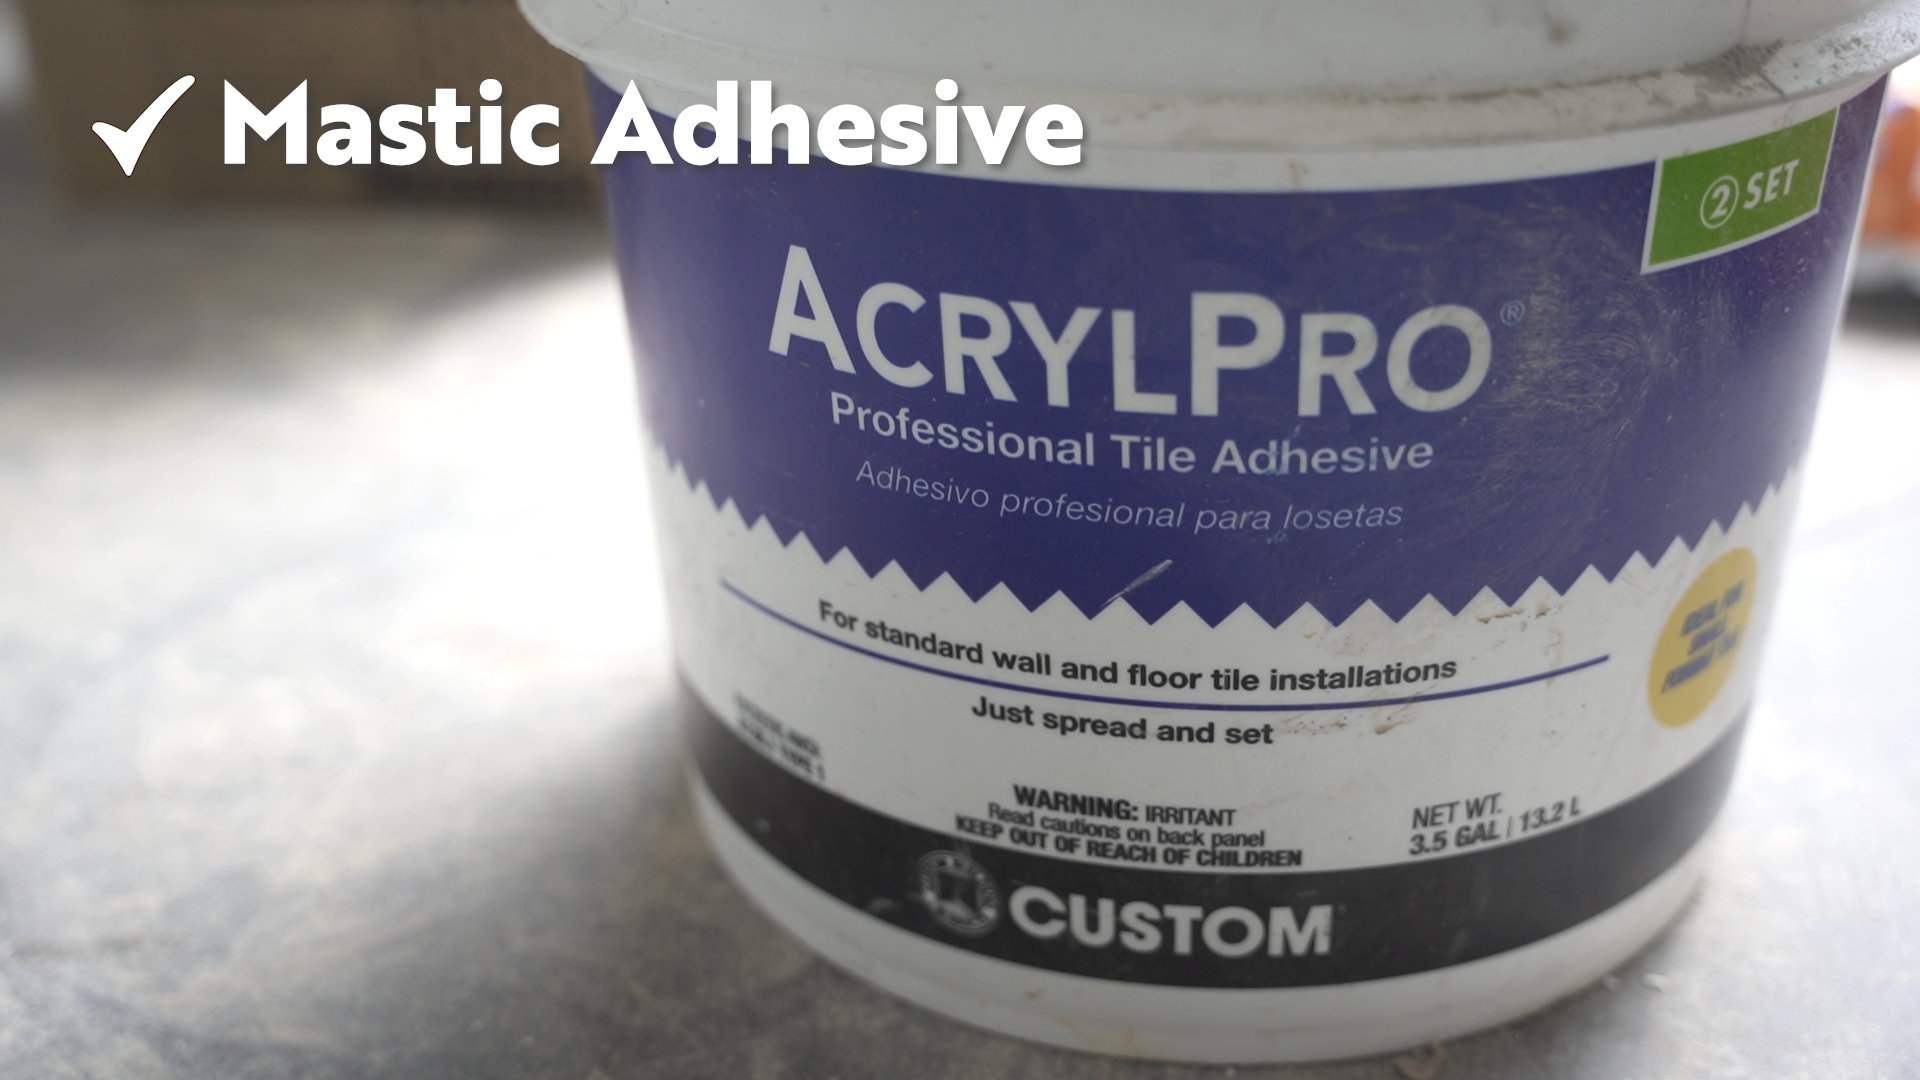
 She places the tiles one by one, using spacers to maintain even spacing between them. Anna used a vertical stack layout for her tiles, but you can use any tile layout you like!
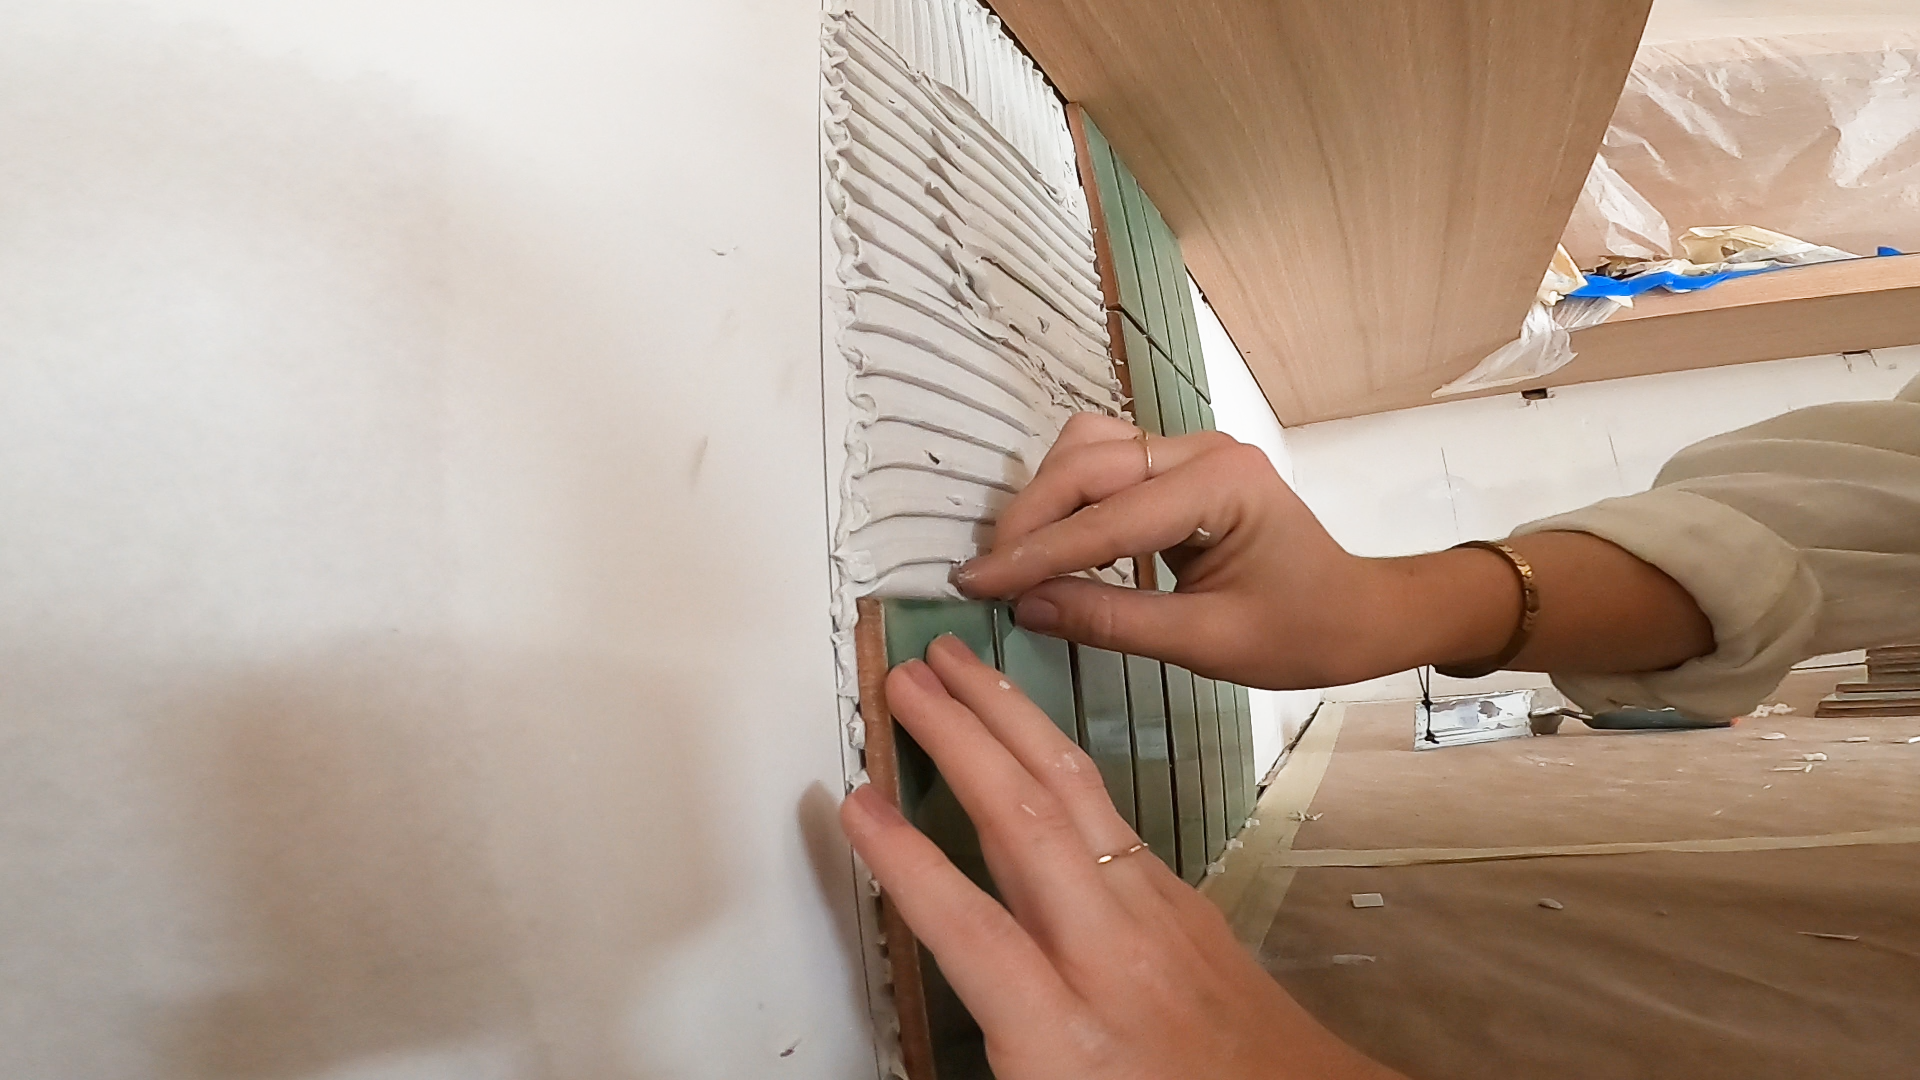
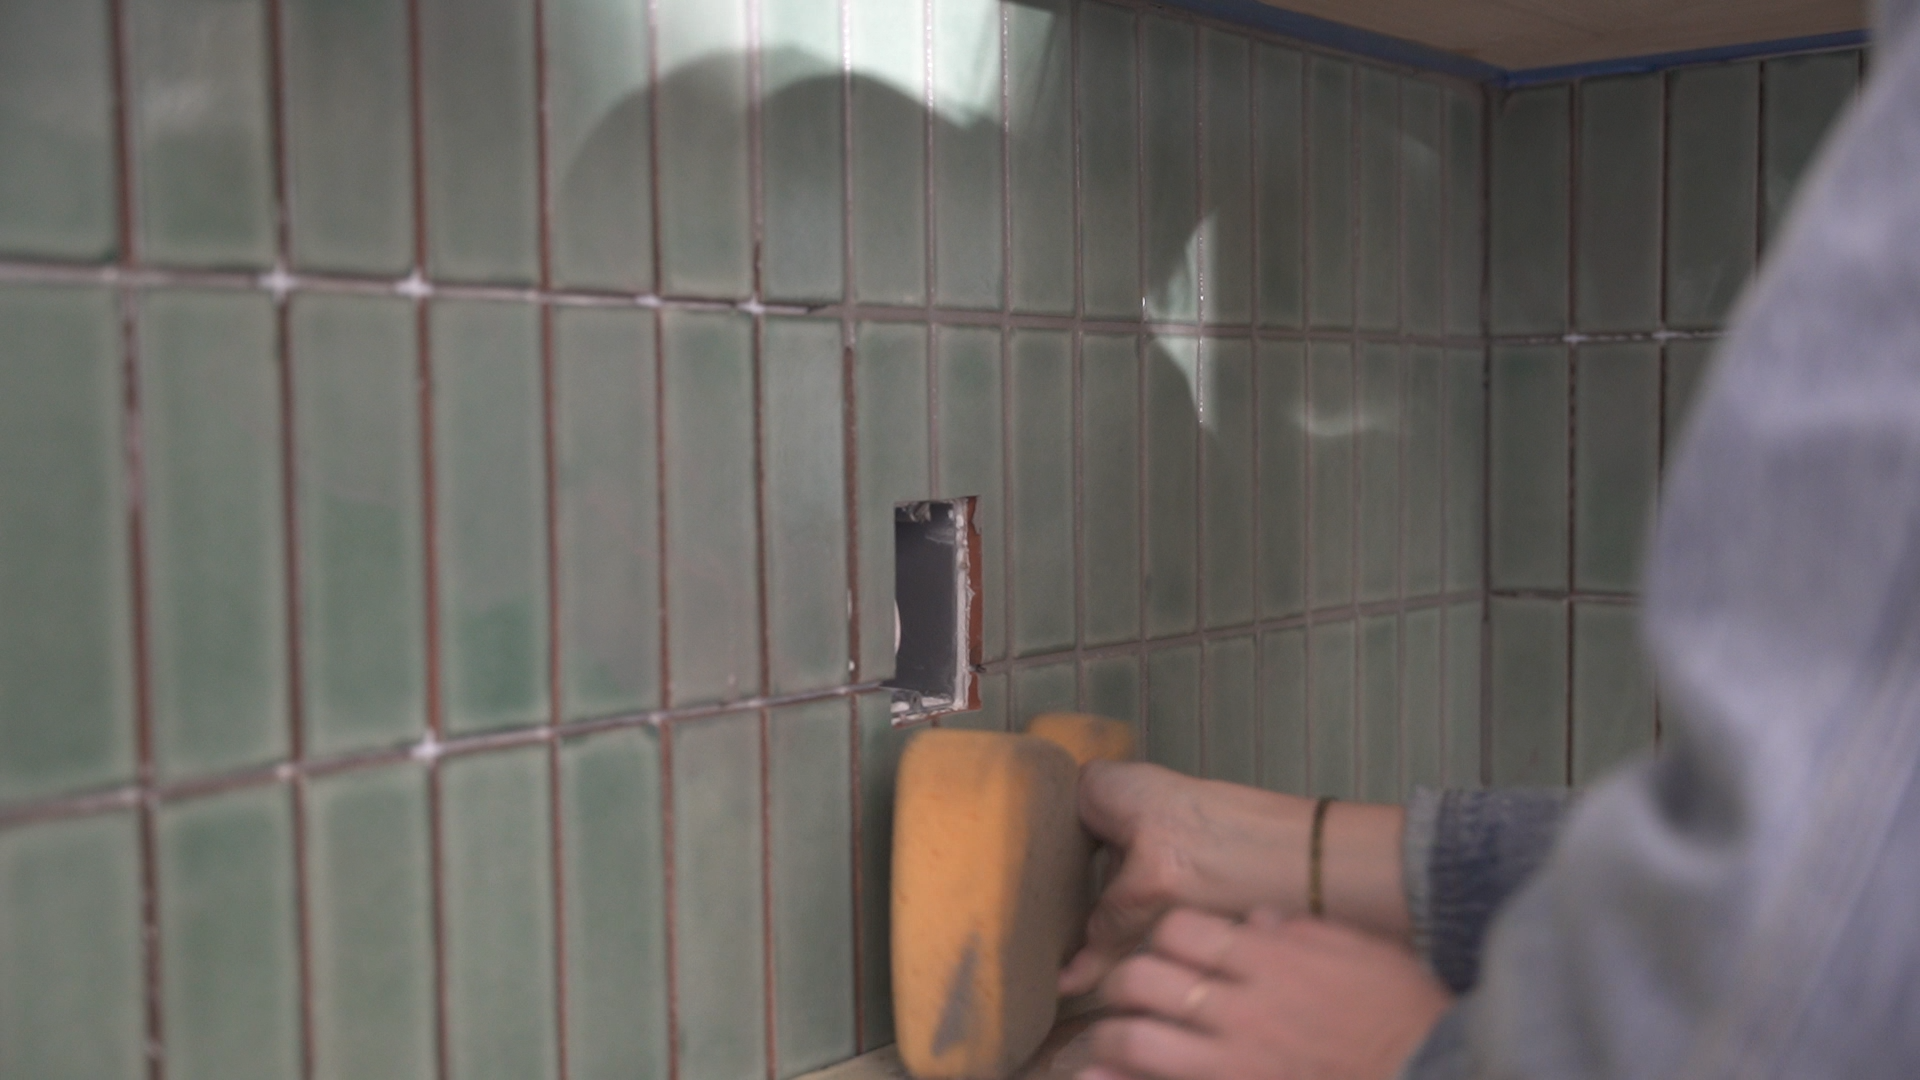
 For areas with outlets or other obstructions, Anna marked the tiles that need cuts with a marker and then made the necessary cuts using a wet saw.
 You don’t necessarily need to use a wet saw; another type of tile cutter can do the job, but it is important to know that, even though tile cutters are pretty simple machines to use, you have to use safety measures when using any cutting tools. Finally, to ensure clean edges, we advise using tape to minimize chipping while cutting your tiles.
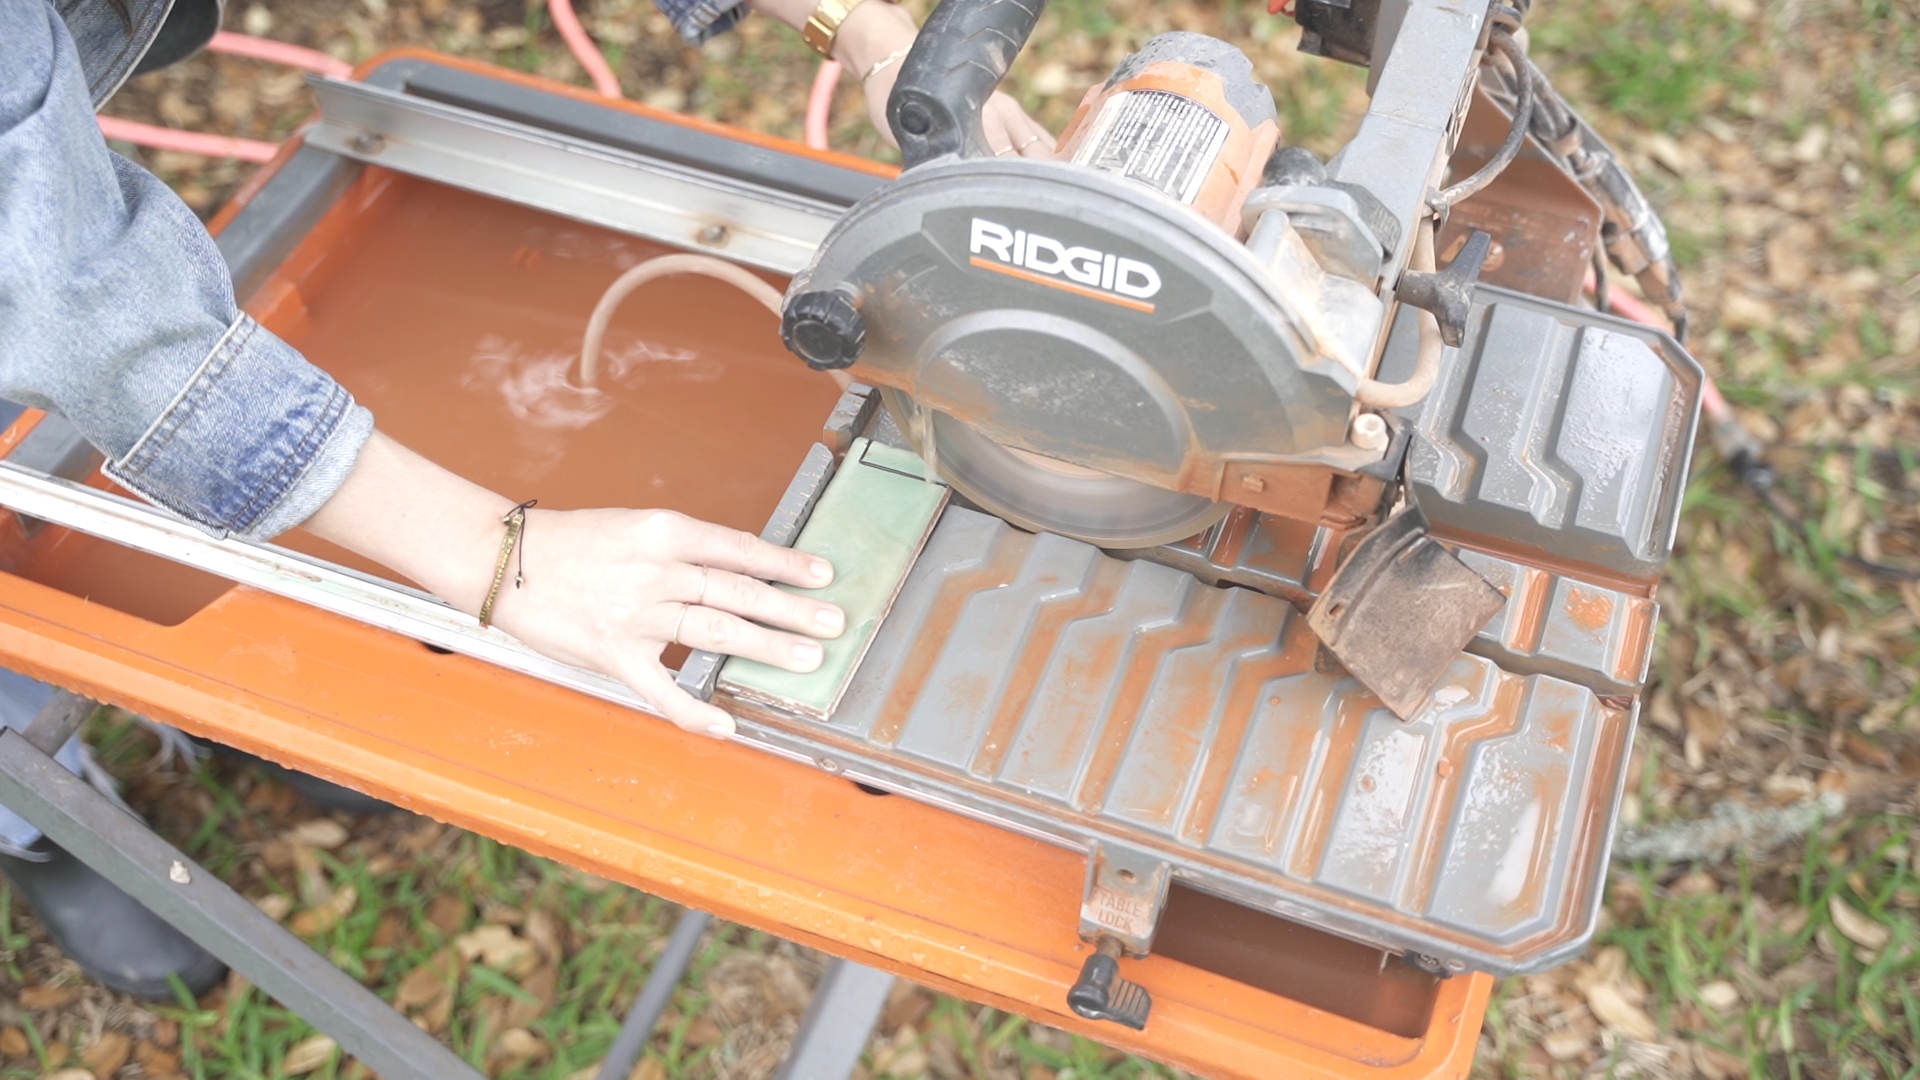
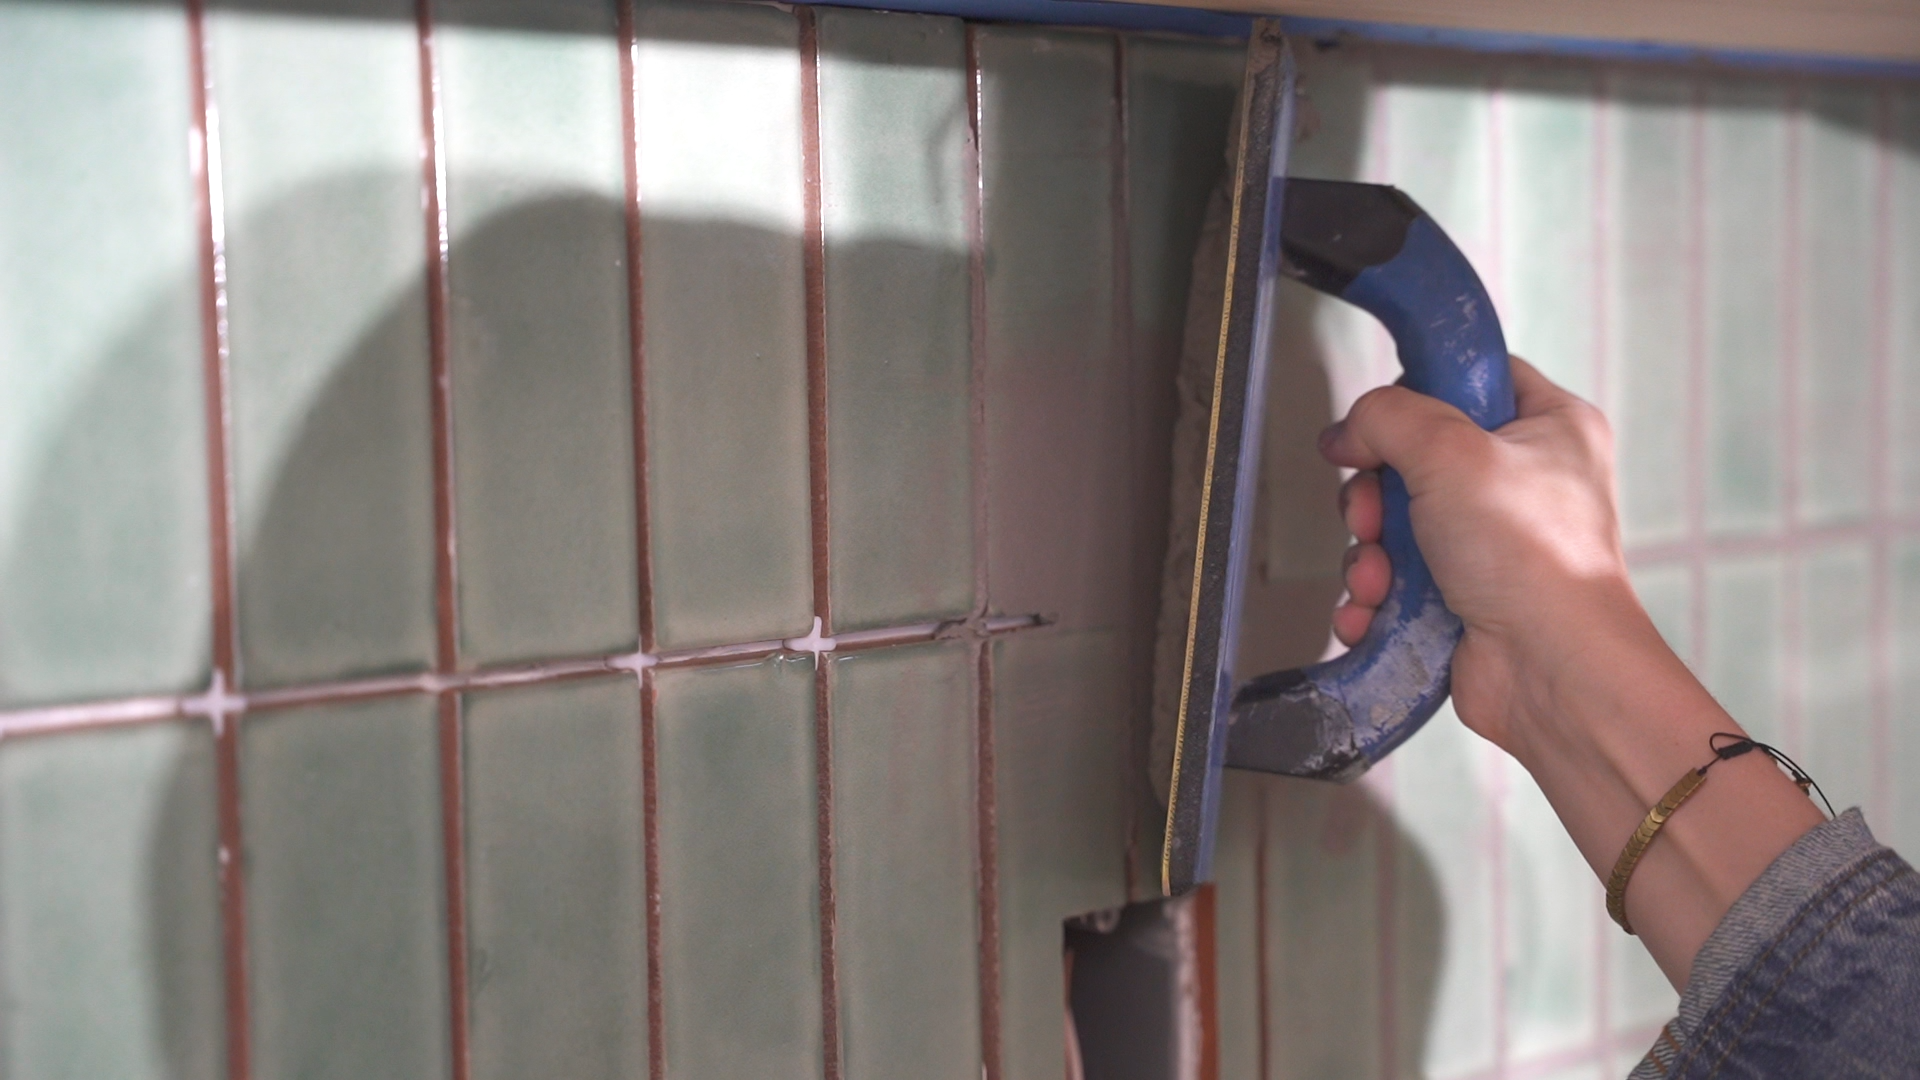
 The last step for this tile installation is Grout. Flex color and Ultra color are the two grout options our DIY newbie discusses. She chose Mapei Ultracolor Plus Fa Grout: it is easy to use and has many color options. We prefer Mapei but you can go with any premium brand. However, we strongly recommend not using black grout, as it can stain your tile. If you want to know more about grout, you can read our grout basics article, or take a look at our guide on how to choose grout color.
Grout Recommendations
Anna suggests considering the movement of your tile, such as pier and beam installations, and the durability needs for different areas. Backsplashes are a relatively low usage installation, but other types of areas such as floors, will need to take additional considerations in mind such as traffic,type of tile and installation method. You can take a look at this DIY project for a floor installation so you can see the differences.
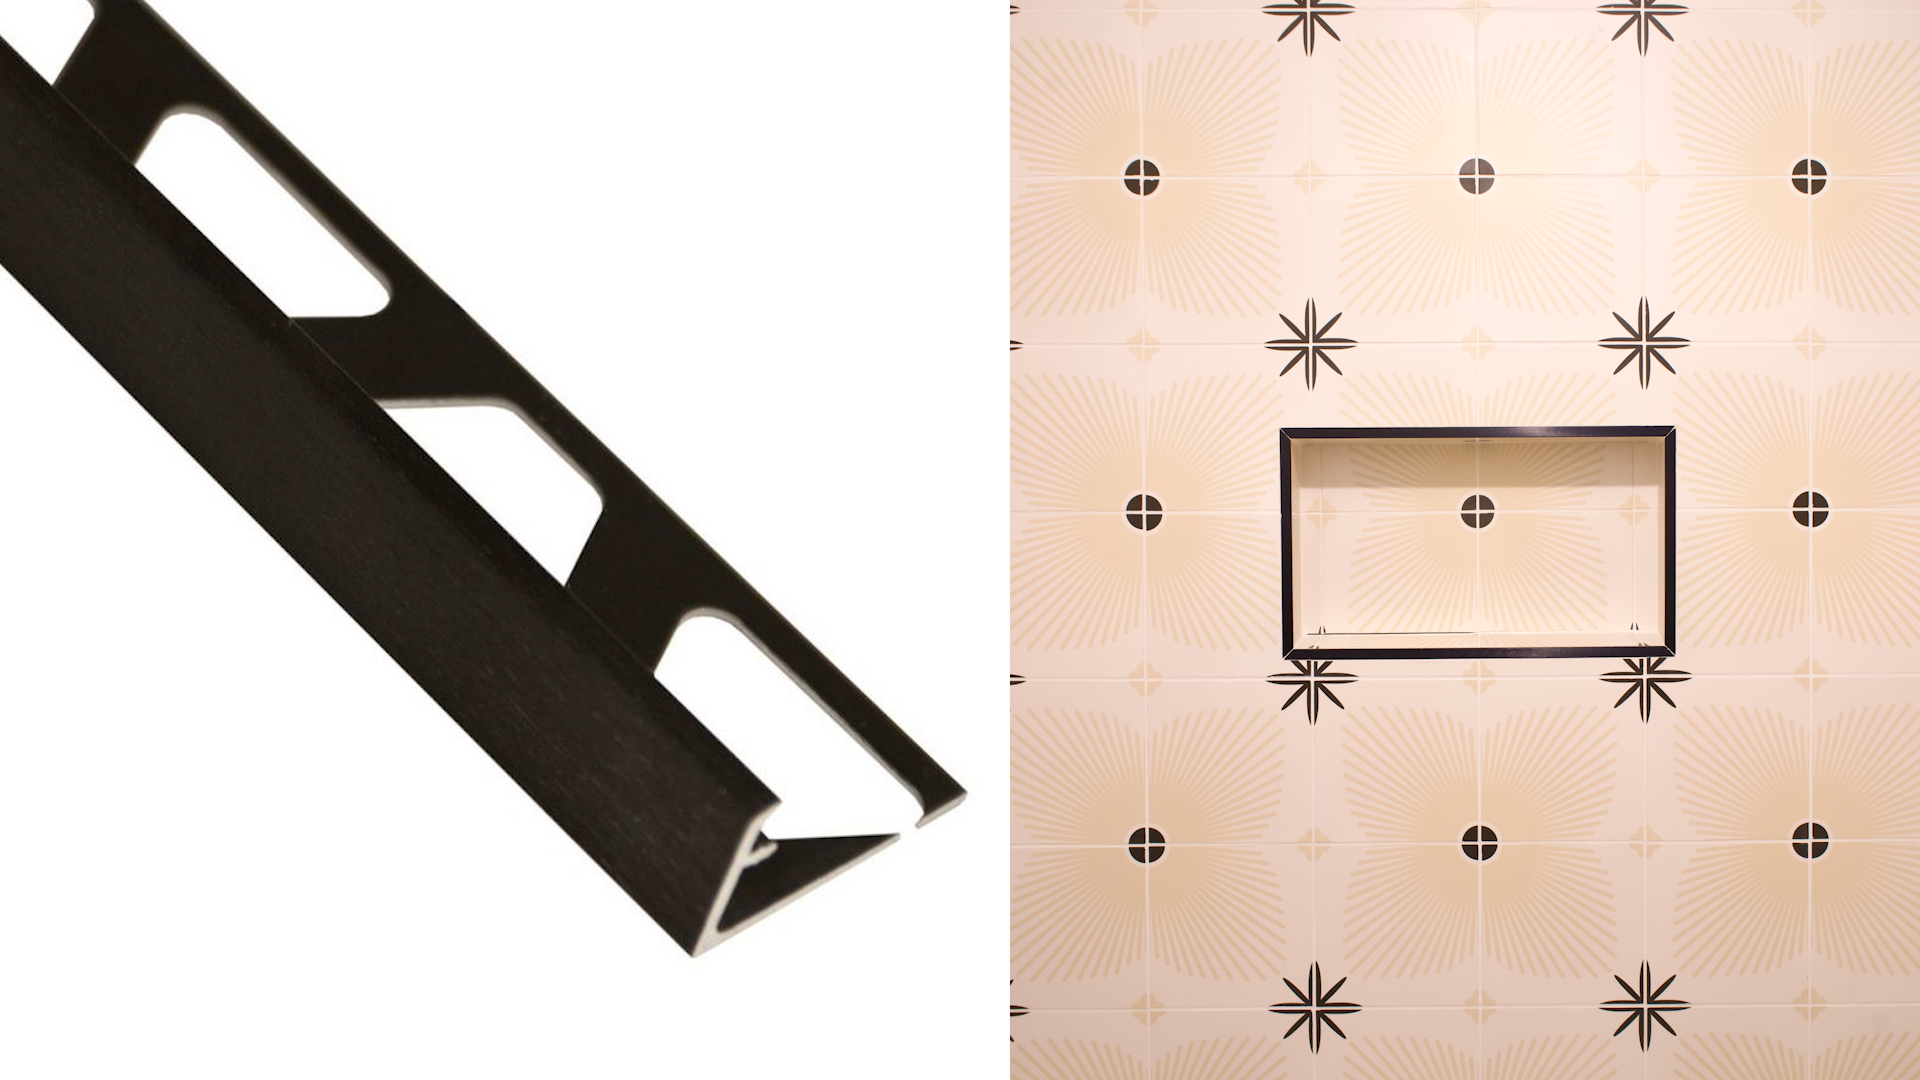
Next, the trim. Anna simply added a painted wood trim to cover the exposed edges of the tile, but you can use any kind of tile trim; from bullnose to glazed edges. Or for a contemporary look, Schluter metal edging, can be a cost-saving tile trim alternative. You should choose a trim option that is best for your installation and aesthetic of your project.
Finally, we invite you to take a look at our Clay Care products. These maintenance items have been carefully tested with our products, and they are designed to preserve your tiles' beauty, ensuring their longevity and durability. From sealers to cleaners, purchasing these maintenance items together with your tiles not only simplifies your order but also prepares you to enjoy your tiles for a long time.
Conclusion
With careful planning, attention to detail, and the right tools, it is possible to achieve a beautiful backsplash that adds personality and style to any kitchen. Anna's project demonstrates the satisfaction and cost-effectiveness of completing a DIY project and encourages others to consider taking on their own home improvement endeavors.


If you need more information, you can take a look at our DIY blog posts and learn more about how to work with different tiles and installations. You can also get in touch with our recommended tile installers, just in case you need to talk with an expert.
And remember, if you have any questions or require more information, don't hesitate to reach out to us at contact@clayimports.com.


